LIVING IN THREE DIMENSIONS by Deborah Kent

The poison bottle stands on a shelf above my desk. Sometimes I pause in my work, lift it down, and turn it in my hands. It is about three inches tall and made of clear glass–before I wrote that statement I checked with my sighted daughter, just to be sure. Unlike an ordinary bottle, it is flat on one side, as though it were meant to stand flush against a wall. The flat side is perfectly smooth, but the rounded side is scored with distinct, vertical ridges from top to bottom.

I bought the poison bottle in a little antique shop in California. The place was crammed floor to ceiling with odd bits from bygone years, and to my delight, nothing was hidden behind glass. The shopkeeper was talking to another customer, and I hoped he was too busy to notice me as I feasted upon the tactile cacophony. I made a fresh discovery everywhere I reached–a wind-up doll, a carpet sweeper, a pile of carved picture frames, a clothes wringer, an assortment of buggy wheels and harness parts.

“Are you looking for something?”

The shopkeeper had seen me after all. My hands dropped to my sides, and I braced myself for the inevitable admonition. Gentle or stern, it would mean the same thing: “Please don’t touch.”

“You have such interesting things here,” I said, trying to distract him. “It must be fun to collect them all.”

He hesitated. I didn’t breathe. “Come with me,” he said. “I want to show you something.”

I followed his footsteps down a narrow aisle, brushing past shelves to right and left, and heard him move some cartons aside. “They made these in the 1850s, before electric lights came in,” the shopkeeper said, placing the poison bottle in my hand. “If you got up in the night to take your medicine, you probably didn’t bother to light a lantern. You did everything by touch. Chances are you didn’t have much shelf space, so your rat poison might be right next to your concoction for headaches. Poison bottles were designed so you could distinguish them in the dark, with your hands.”

After I bought the poison bottle, I tried to think of objects in general use today that are specifically made with touch in mind. My list was pitifully brief. Computer keyboards have a raised dot on the f and j keys to help the user position his/her hands without looking, and the 5 on a telephone keypad is also marked with a dot. It seems a paltry concession to the hand, compared to the myriad appliances and devices that cater to vision. Colorful packaging; sleek, buttonless screens; and the dazzling graphics of webpages all testify to the primacy of sight. The hand–despite its capacity to gauge size and weight, texture, shape, and detail–has been rendered nearly superfluous as a means of perception.

As a blind child, I was blessed with parents who understood that touch was my portal to knowledge. When I was three or four, my mother showed me split-rail fences, mailboxes, fire hydrants, lawn chairs, birdbaths, and telephone poles. My father took me for walks in the woods and showed me acorns, mushrooms, and the footprints of rabbits and raccoons. Together we explored the construction sites in our suburban development. In half-finished houses I learned that doors and windows fit into frames and discovered that bathroom pipes descend through holes in the flooring. My hands gave me a vast repertoire of information that has endured and expanded throughout my life.

The desire to touch was not unique to me as a blind child. All children have a hunger to touch the objects in their environment. In fact, the eagerness to touch motivates most early movement. When Baby Sarah spots a bright pink rattle across the room, she is not content to lie on the carpet and admire it from afar. She wriggles forward, focused and determined, until the rattle is in her grasp. Now she is free to learn about all its properties. She rubs it and pats it, feeling its hardness and its smooth, rounded shape. She shakes it and listens to ms mysterious clattering sound. She puts the handle into her mouth and explores it with her tongue and gums. Her hands bring the rattle close and give her an intimate knowledge that she would miss if she only viewed the object from a distance.

Nevertheless, touch is highly subject to regulation, and the rules go into effect by the time a child is old enough to walk. “Don’t touch the Christmas ornaments–you’ll break them!” “Don’t touch Mommy’s scissors–you’ll get hurt!” “Keep your hands to yourself–that doesn’t belong to you!” “Just look at it. Don’t touch! Don’t touch!” The richness of tactile experience is forfeited, and touch becomes suspect. It is the terrain of infants, deviants, and thieves. Vision–so safe and clean–reigns unchallenged.

As early as Old Testament mythology, touch was cast as a dangerous and forbidden sense. In the story of the Garden of Eden, Eve reports to the serpent: “But of the tree which is in the midst of the garden, God hath said, Ye shall not eat of it, neither shall ye touch it, lest ye die.” Eve ignored God’s “look, don’t touch” mandate, and as a result, humankind has suffered to this day.

Despite Biblical sanctions, or perhaps in reaction against them, touch came into its own during the European Renaissance. Touch was considered the master sense, able to verify and expand upon characteristics only superficially perceived through sight. Benedetto Varchi, a sixteenth-century Florentine historian, claimed that the sculptor’s art could best be appreciated by touch. In the eighteenth century the German philosopher Johann Gottfried Herder praised the value of touch over sight, which he dismissed as “a superficial sense which can only render the surfaces and colors of objects.” *1 Perhaps the most remarkable manifestation of this enlightened attitude toward touch is the eighteenth-century museum.

For me, a visit to a museum is a series of encounters with velvet ropes, wooden barricades, ever-vigilant security guards, automatic alarm systems, and implacable sheets of glass. Whether African wood carvings, specimens of shells and minerals, Native American artifacts, or figures cast in bronze are on display, no enjoyment or understanding through touch is permitted. In contrast, visitors to the museums of eighteenth-century Europe were not only allowed, but encouraged to touch the items on exhibit. In 1694 a visitor to the Ashmolean Museum at Oxford University described handling a variety of exotic objects, including a lodestone and a cane “which looks like a solid heavy thing but if you take it in your hands [is] as light as a feather.” *2 According to Constance Classen, a researcher on historical attitudes toward the senses, “Museum visitors, as polite guests, were expected to show their interest and goodwill by asking questions and by touching the proffered objects. To be invited to peruse a collection of exotic artefacts or “objets d’art” and I not touch anything would be like being invited to someone’s home for dinner and not touching the food.”

By the middle of the nineteenth century, however, the museum had become an altogether different place. No longer were visitors the personally invited guests of the owner or management. Museums had opened their doors to the general public, and there was mounting concern for the safety of the objects they housed. Visitors were required to stand back and view the exhibits from a distance. To touch a precious object was considered disrespectful and potentially damaging.

This change in the museum reflects the social transformation that Classen calls “the rise of visualism.” Unauthorized touch caused anxiety to an emerging middle class that had goods to protect from theft and breakage. An obsessive fear of dirt sprang from the new understanding that invisible germs caused sickness. The hands carried treacherous bacteria from one person to another; to touch an object that others had handled was to invite some dire disease. Furthermore, Victorian prudery and Freud’s obsession with all things sexual welded the connection between touch and something that “nice people” shouldn’t do.

By the beginning of the twentieth century, touch was closely identified with the poor and unwashed, whose overcrowded slum dwellings swarmed with vermin and vice. A book on etiquette contained a whole chapter on avoiding the touch of “undesirables.” Readers were advised to stay away from “slums, local trains and streetcars, third-class pubs, cheap seats at movie theatres, and crowds or celebrations in the streets.”

Technology helped the middle and upper classes escape the contamination of touch that they had come to dread. Improvements in lighting made visual observation more effective at home and in the wider community. The greater availability of glass, and later the development of clear plastic, shielded merchandise from touch while it remained fully accessible to the eyes. In the United States, window shopping replaced the trip to the market, with its open bins of vegetables, hardware, and dry goods.

The trend that began with our Victorian forebears is amplified in today’s technological frenzy. Any facet of the world can leap into focus on the computer screen. From the safety of one’s own living room, one can now explore a Maori village, examine the world of a coral reef, or study the fine points of a Classical Greek vase. The only need for the hand is to click the buttons on a mouse. In the virtual world it is possible to build a house without lifting a hammer or to dissect a cadaver without ever wielding a scalpel. Touch is precluded by the onslaught of visual information.

For blind computer users, a number of clever programs convert the text on the screen into human-like speech. Yet no digital genius has found an effective way to bring a third dimension to the screen. To my hands it remains lifeless. My fingers find no aesthetic delights, no maps or diagrams, no images of objects ordinary or extraordinary.

Beside the poison bottle on the shelf above my desk lies a polished stone. A friend brought it to me from Bryce Canyon in Utah. Like the poison bottle, it is flat on one side and rounded on the other. The rounded side, nearly a perfect oval, is burnished to gleaming smoothness, a miracle to my touch.

I turn the stone over, flat side uppermost. Chiseled into the surface are a palm and five slender fingers. Perhaps the carving was made by a talented machine with a blade that knew its way from pinkie to thumb. But I like to imagine that it is the work of an artist who used real tools upon this real stone, and with the power of touch, created a tribute to the hand.

Arts In Society Grant Update

Working in class, Jenny is adding, colored clay, nerves to the arm of her plastic base model. She has already added muscles of the upper leg and arm, arteries of the arm and hand and a heart.

Jenny is adding, colored clay, nerves to the arm of her plastic base model. She has already added a number of muscles, arteries and organs.

This year I am celebrating my 20th Anniversary of teaching art at the Colorado Center for the Blind (CCB). As I inch towards retirement I was concerned that the art program would fade away if I didn’t take some action to make sure that a succession plan was in place. To me, this meant that I needed to find a teacher to take the program over after I left.

When I first came to the Center in 1998 I was seeking help with a public art commission at the Colorado School for the Deaf and the Blind in Colorado Springs. My only concern was to make a good piece of art that was also accessible and meaningful to the students.

I found the folks at the Center were happy to help me with critical advice about my approach to my project. I was also introduced to a student who was in the middle of a complex project. He was creating a tactile map of a large hotel in Atlanta, the site of the National Federation of the Blind Convention in 1999. This student asked if I could read floor plans.

And so my education began. David James, whom I was working with, clearly instructed me as we made stairs out of popsicle sticks: “Ann, make a set of stairs. Now close your eyes and make another set and pay attention to how you do it. Make as many as you need to until you figure out what you are doing. Next, tell me.” That was the beginning and has remained the foundation of how I teach. I learned about how genuine accessibility and effective communication can create an inclusive learning environment.

The next year I offered to teach. For many years I was just trying to find the edge of the envelope of what kind of art my students could make. We never did find that limit and I now know that people who are blind are no more limited in their potential than a person with sight. Creative vision does not discriminate!

When I heard about the Arts In Society grant I couldn’t help but think that this might enable me to explore the idea of offering training to a person who was interested in teaching art who was also blind. I had a student in mind and I wrote the grant. Her name is Jenny Callahan and she had gone blind overnight about two years before I met her in my art class. She had just recently graduated from the Center when this opportunity presented itself.

We were awarded the grant in 2017 and so the adventure began. It was not easy for Jenny and me to form this new partnership. And this is where the true value of the grant became apparent, as I felt a huge obligation to make it work or give it back. And so when we ran into an obstacle we would collect ourselves and try again.

Our big breakthrough came when I finally understood that even though she did indeed want to teach art, she had her own ideas about what and how she was going to go about it! It seems funny looking back now that the key trait that anyone needs in the arts is creative thought and that was what was getting in our way. Once I understood that I could best serve our goals by guidance and not instruction we started making headway. We began seeking out specific information to help Jenny accomplish her goals. This has taken the form of offering and taking workshops. We have also been able to order tools and materials for new techniques of art-making for community projects.

The Arts In Society also allowed Jenny to test her abilities when she was able to conceive of and organize a large community project in Orlando, Florida at the National Federation of the Blind Convention. She invited anyone interested to stop by and contribute as much or as little as they wanted to take part in the construction of a huge colorful octopus “Calypso” that was then displayed in the main convention hall where 3000 attendees could appreciate the work of their cohorts.

During this grant we have had the chance to work with Marie Gibbons to learn hand-built clay techniques. Jenny is working with an intern from Katie Caron’s ceramic class at Arapahoe Community College to set up the art room at the Center so that Jenny can offer wheel-thrown pottery instruction. We took a class on costuming from Virgil Ortiz at the Colorado Fine Arts Center. And now we are getting ready to take an anatomy class from Zahourek Systems. These opportunities were made possible by the grant and are essential in building Jenny’s repertoire of creative options.

Our community is growing. Just as I was instructed by my first student. All my students became my instructors.

Jenny is now teaching 3D sculpture at CCB on Fridays. She is offering paper machè, chicken-wire float sculptures, alabaster stone carving, hand-building clay techniques, wax sculpture to be cast in bronze, and whatever else she cares to do! Soon she will also be able to offer wheel-thrown ceramics!

I am teaching a 23-week program to all the students at the Center on Tactile Drawing. It includes concepts of perspective, drafting and STEM illustrations (charts, graphs, maps and diagrams) as well as creative self-expression. And the great news is I am working with a staff member from the Center who is proving to be an adept teacher herself as she quickly learns the concepts and then assists me in teaching. My fingers are crossed that she will be interested in continuing!

This Arts In Society grant continues to make an impact every Tuesday and Friday in art classes at the Colorado Center for the Blind. On the third Tuesday of each month is the Tactile Art Club at CCB from 6:00 pm to 8:00 pm. If you would like to stop by and observe either class please contact me at acunningham@cocenter.org to make arrangements. Or, if you would like to join us for Tactile Art Club, please send me your email address and we will send you an invitation with times and location. Everyone is welcome!

Ann and Mo working with Octavia in the art room

From left to right:
Octavia Johnson (Student, Colorado Center for the Blind), Monique Melton and Ann Cunningham. Photo by Mike Thompson

“I did not have much experience with art when I was younger but I had some with sculpting. I didn’t stick with it because I didn’t quite understand how to go about it or what it was supposed to look like.  Now that I am involved in the creative process of learning how to teach drawing it is definitely harder but it is possible to get so much information from a picture. I think that few blind people believe pictures are going to be valuable but once they understand the process and can apply the concepts they learn more about their world and are able share their imagination.”
Monique Melton
Enrichment Coordinator
Colorado Center for the Blind

Jenny interacting with Marqus who is working with clay

Jenny Callahan teaching art at the Colorado Center for the Blind.                            Photo by Mike Thompson.

“Arts In Society exposed me to many of the creative and supportive opportunities that are in the Denver Arts community. It is innovative and expansive which helped me connect and broaden my network of learning and sharing. Arts In Society gave me the opportunity to connect locally and nationally which enabled me to create, teach, and speak about the importance of tactile art to many larger audiences. It has allowed me to expand awareness to both creators and consumers of what tactile art can be. The key to understanding is that tactile art is not taking a picture and making it touchable but connecting with the source material and making that into a tactile work of art.”
Jenny Callahan
Multi-sensory Artist
3D Art Teacher
Colorado Center for the Blind

November Round-Up

Zach Wolfson has finished editing our conversation about the directions we hope to take our work. I hope you enjoy his beautiful work. Thanks Zach!

Jenny Callahan is sitting on the floor of the art room at the Colorado Center for the Blind curling a six foot chickenwire octopus leg into a spiral so that we can fit all eight, plus its body, into boxes to ship to the Orlando NFB National Convention last July. This octopus now lives in Baltimore, but we have Calipso Too, who will make an appearance at the Shared Visions exhibit.

To hear an in-depth interview with Jenny and myself please click here. In this interview I wanted to touch base with Jenny so that we could capture her hopes and dreams at the beginning of her art teaching career. We are coming in on the end of our work sponsored by the Arts In Society grant that gave us this opportunity to work together for the last two years to make both our ambitions a reality. Jenny is now teaching classes at the Colorado Center for the Blind and attending classes in wheel throwing ceramics, anatomy and fantastical costuming. All were made possible by the generous grant from the Hemera Foundation and Bonfils Stanton Foundation as it was administered by RedLine Gallery. It is a joy being a part of this community.

Preparing an Octopus for Shipment
IMG_3067

Touching Imagination: Unlocking the Creativity of Blind Artists

Here is the transcription of a speech I gave at the National Federation of the Blind Convention in Orlando, Florida. This piece was originally published in the Braille Monitor in 2017.

From the Editor: Ann Cunningham is an artist who works as the art instructor at the Colorado Center for the Blind. Sometimes our biggest problem is not what we do not know. It is that we do not know what we do not know and therefore never have a clue about how to inquire into or learn about it. Such has been my experience far too often when things are not verbal or don’t impress themselves on me tactilely. Art falls into this category. I know that art is something I cannot see, so I immediately write it off as one of those opportunities I cannot enjoy, and I content myself by rejoicing in those I can. There’s nothing wrong about being grateful for enjoying what one can or admitting that blindness means some things we cannot enjoy. The problem happens when I too quickly write off art as something that cannot be meaningful to me when the truth is that it can if only I am willing to open my mind to explore it. The speech which follows has encouraged me to rethink what art can mean for me, and the artist who is so committed to opening this possibility for blind people is as articulate as she is artistic. Here is her well-crafted and beautifully delivered presentation made on July 15, 2017, at the convention:

Thank you so much, President Riccobono, for inviting me here today to talk to my Federation family about tactile art. I’ve been a member of the Federation since 1999, and what brought me to the Federation was my artwork. I’m a stone sculptor and tactile artist, and I’m proud to be able to say I teach art at the Colorado Center for the Blind [cheers]. Back when I was first starting, I was a typical artist making visual art, but as I sculpted the stone I realized that the feel of it under my hands as I created the form kept suggesting this touch thing seems powerful. There really is something here. Eventually I was introduced to the people who would help me start figuring out all this stuff at the Colorado center. I began teaching art classes and have been exploring what art can be with students and staff ever since. Our motto is, “If it feels right, it is right.”

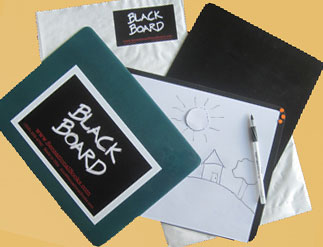
I began attending National Federation of the Blind national conventions in 2001—anyone here remember Philadelphia? [cheers] I had an art exhibit in the exhibit hall that year. I have presented art-related activity every year since. For the last seven years Debbie Kent Stein from Illinois and I have been collaborating on programming for our drop-in art room. I know a number of you do know about it because each year we have the tables filled with artists and artists-in-the-making as they play with aromatic homemade playdough or create raised-line drawings on the Sensational BlackBoard or check out the original works of art displayed around the perimeter of the room. Many outstanding volunteers have made this experience fulfilling and fun.

But I know a whole lot more of you might be wondering, “Tactile art? What’s that?” because there are far more of us in this general assembly than end up in the art room. So let me give you my definition.

I define tactile art as artwork that can be understood through touch. Even though it might look pretty good too, the looks are secondary instead of the focus. The focus is now placed squarely on how effectively the sculpture can communicate with others when someone places their hands on the artwork. We can also add more sense into the mix. This year we had a number of people experience our first instillation artwork called “Off the Path.” This piece created an environment that included lots of full-surround tactile input as well as layered sounds and smells.

Okay, so art is nice. It can be fun, maybe inspiring; it even offers a way for people to express themselves. And yet you still might not be convinced that this is where your energy needs to go. Let’s take a moment and look at the flipside of this coin: tactile graphics. Images can give us a way to study and share complex ideas that would take hours to explain and multiple times to comprehend. For instance, how much different do you think a student’s learning outcomes would be if as a matter of course they had an image to go along with the description of a human skeleton? If a student could feel the bones as they are described and examine the joints as they are explained and go back and study them after class on their own; do you think they might understand more concepts and retain more information? [applause]

Charts of all kinds—graphs, maps, and diagrams fall under the heading of tactile graphics. No one comes into the world knowing how to interpret pictures. Sighted parents spend hours poring over baby books teaching sighted children to read pictures. I’m not sure that parents know that’s actually what they’re doing. Parents are drawn to these activities because they are fun, entertaining, and educational for both the child and the care provider. I have seen people of all ages quite easily begin learning how to interpret tactile images once they have the opportunity. But how much more fluent would a person be if they were using tactile pictures as tools from the time they were small? Picture books should be a part of every child’s education—whether blind or sighted. [applause]

Looking at pictures should just be one part of the visual literacy. Just as verbal literacy is broken into two parts, reading and writing, I see picture interpretation as one part and picture creation as the other. Think about it for a moment: there should be no reason that blind people should not be the creators of tactile images as well as the consumers. [applause] It does take skill and education to create tactile images, but it does not take sight. Tactile images need to be formatted differently from visual images, but who knows that better than a tactile picture consumer? We need to discover the best way to tactile literacy, and the American Action Fund’s initiative is taking an amazing step with their tactile art kits. If you know of a blind child, I hope that you will help connect them with this program so that Mrs. Maurer and our team can learn how to best develop this important early learning activity.

Thank you to the NFB. Thanks to the NFB, I know that all of this is possible. For the last two summers I have been invited to teach at the summer EQ STEAM Program in Baltimore with Natalie Shaheen. I am the drafting instructor. We gathered the tools together so that students would have what they need to accomplish the task I would instruct them in. All I needed to do was teach. I have the faith because I have had so many successes at the Colorado Center for the Blind over the years. This is because of Julie Deden’s prime directive: When we ask her if we can do something, she always says, “Sure. Go figure it out.” So I have come to believe that it is all possible.

So we planned into the curriculum that I would teach the students first how to sketch out their ideas to build their boats out of PVC pipes, tarps, and tape. But the real kicker was that after that, one person from each of the teams needed to do an orthographic projection and isometric perspective of their final boat design to include in their deliverables. Now, if you need to look that up to understand it, don’t feel alone; I did too. But what I want to share with you is that these are the vital engineering skills that a person’s future could turn on. I’d never taught it before, but when the day came, we had to try. So I approached it as logically as I could. We started a cube drawing in perspective, first. I held up the cube in front of the student and said, “Look at this model. The lines will represent each corner.” Step by step, this young lady, who is totally blind and at the beginning of the week was learning how to hold a pen, worked through the drawing. First a vertical line, then two thirty-degree horizontal lines—not just because I was telling her what to do, but because she could feel the cube; she knew where the corners needed to be represented, and she could understand how the principles needed to be applied. She figured out what needed to be drawn next. I have to say it was breathtaking—and we both let out our breath—but we also noticed that a number of other teachers had gathered around when they let out their collective breath as well. It is still exciting for me to see the understanding light up in someone’s face when they learn these techniques.

But the real test is can the students use these concepts by applying what they have learned to other projects? Well I am very happy to say that I have seen numerous students successfully use these skills to then illustrate the boats that their team had constructed.

I recently received a grant from Arts in Society, an art organization in Denver. I am collaborating with a graduate of the Colorado Center for the Blind, Jenny Callahan, to see if we can develop her own tactile mapping company. I have never done anything like this before, but I am very confident that we will figure it out. [applause]

This year the NFB has sponsored three tactile art and tactile graphics symposia. I have worked with Anil Lewis and Lou Ann Blake in an effort to develop a corps of people who are interested in talking through all the issues that we need to address. The first event was in Baltimore, the second was held in Colorado in collaboration with the Colorado Center, and the third is a collaborative event with the Lighthouse for the Blind in San Francisco. At each of these small gatherings we expand our circles of friends and our understanding of the issues a bit further.

Now, I am a sighted artist, but I know that my inkling of a belief that there is something powerful here is now a full-blown understanding that there is so much more to our experience of the world than visual input. I know far more is attributed to vision than it actually deserves credit for. NFB member Peter Slayton—who is also an artist—said, “We need to change the perspective on how we frame what we are doing to illuminate the assets of tactile art. What can we do beyond visual art?”

Well, one thing we know is that we can feel 360 degrees at once; no one can see that. What else is possible? I am sighted, but by spending time exploring my world through my other senses, I realize that when I close my eyes, I suddenly expand my world in whole new ways that are unexpected, enlightening, and exciting. I am inspired by the moment that I had at the Colorado School for the Deaf and the Blind. I was commissioned to create an accessible work of art for their newly-renovated dorm. I met with the student council to talk about what they might like to have included in an art experience. What I experienced was a room filled with more people who were deaf than were hearing. At one point—as a hearing person—I became disabled to fluently participate in the conversation because the signers were talking much faster than the interpreters could voice for me. I want to invite you to work with us on flipping our situation in new ways, too. Wouldn’t it be great to walk into a multisensory art exhibit where people who only know how to look at the world miss the crux of the entire exhibit? [applause]

Thanks to creative initiatives like the tactile art box by the American Action Fund, I look forward to the day—and I hope it’s soon—when I hear a young blind child saying, “What do you mean that in the old days we didn’t have pictures?”

We have some thoughtful vendors who are promoting innovative products, like the Graphiti at American Printing [House for the Blind]—I hope you guys got to see that, the art exhibits by Touch Graphics, digital images by Irie-AT, and school workbooks by E.A.S.Y. LLC, and many more. Like HumanWare, all vendors need to know what you need. This helps them go straight for what is needed most. Share your ideas; there is so much to do. There is plenty of space for all of us because what we are trying to do is not to duplicate but to echo the artistic and communication progress that has been made in the visual world since the Renaissance. My personal theory is that we behaved as multisensory beings before the invention of glasses, lenses, mirrors, and cameras. They introduced those innovations that emphasized the visual sense. Let’s work together to reclaim and elevate our other senses. [applause]

But we need you. Debbie Kent Stein and I are honored to be asked to start the NFB Tactile Art Group. We have an NFB listserv called “Artists Making Art,” and we have a Facebook page called “Tactile Art and Tactile Graphics Symposium.” This sounds good, but we need someone who knows how to make these useful, and it is not me. If you’re sitting here and thinking you would like to get involved, please do. We need you, we need your ideas and your artwork to inspire us, and we need your help spreading the word—can you write? We need your ideas about how to move forward. Jim Jackson from Oregon had an idea to have a tactile map contest for people to make and display maps of our hotel next year. What a great idea. [cheers]

We’ll be able to show just how creative folks can get and how useful images can be, but we can’t do this alone, nor do we want to do it alone. If you are a person who has ideas or abilities to share, or just the interest, please connect with me at ann@acunningham.com. We need your help and your ideas and your energy and enthusiasm. Next year let’s make the art room a place of wonder! [applause]

Rebecca Jackson Reads “Sadie Goes To Lost And Found Pound” for the First Time


Colorado Center For the Blind student, Rebecca Jackson, reads Sadie Goes to the Lost and Found Pound for the first time. It was fun to explore the different types of dogs and their toys with her! This book and more are in the works this year. We hope to begin releasing them early next year. Be sure to sign up to receive our email updates if you would like to hear about the release dates.


Adding Sound To Images

I always have print and Braille labels with my artwork but sometimes being able to access audio files is preferable. I would like to share the methods I am going to be using at my next exhibit. There is a broad range of solutions. If you have some solutions of your own I would love to hear about them, too.

Links to vendors mentioned in this video:

PiggyBack
Go here to explore accessible exhibits in your area!

Touch Graphics
Go here to discover what Steve Landau and his team are cooking up next. He always has new innovations afoot.

Pen Friend
This product is made by RNIB (Royal National Institute of Blind People) and can be purchased in the U.S.A. on Amazon or the Braille Bookstore.

We purchased the sound cone recording devices at Big Dawgs Greetings.

If you would like to share information about methods you know of, or have created, please write a reply and join the conversation!

I hope to see you at the Denver Art Museum. Please be sure to introduce yourself!


Tactile Art Clubs feels how to felt.

20170321_192702_1490153561899

(photo description: Eight members of the Tactile Art Club are covering styrofoam egg or ball shapes with many thin layers of colorful wool. Some people have on gloves and others are working with bare hands. Everyone has a 16oz cottage cheese container filled half-way with warm water, a nylon knee-high stocking and a bar of Ivory soap in front of them.)


Tactile Art Club members at the Colorado Center for the Blind learn how to felt wool. This activity was organized by Linda and Bill Truman. They not only went out of their way to conduct a very fun class they also wrote down the steps so that you too can try your hand at this art form.

by Bill Truman

Felting a Christmas Ornament (Ball) or Easter Egg

Materials and Supplies:

Styrofoam form (Ball or Egg)

Approximately one-half ounce of carded wool (preferably Merino)

One (1) nylon pantyhose stocking

Container/bowl for hot water

Plastic food concessioner gloves (optional)

One (1) bar of soap (preferably pure soap without moisturizers or fragrances like Ivory)

String/twine (fine, smooth, not rough; if making an ornament to be hung)

One (1) 5 inch rug needle (for stringing the ornament)

Towel (facial or hand towel) or paper towels

Instructions:

1. Lay out the materials and supplies on a table or flat surface in front of you in a manner with which you are comfortable.

2. Choose a base color for your project and, if adding a secondary color, the complimentary color to your base.

3. Hold the base color wool in your non-dominant hand tightly.  With your dominant (right or left) hand, pull off a shank of wool about 8 or 9 inches long.  (Note:  the width of this type of wool is generally standardized at approximately 1 ½ inches wide.)

4. Before beginning to apply wool to the Styrofoam form, rub your fingers over the ball or egg and familiarize yourself with the feel of the Styrofoam texture.  When you have completed the initial wrapping process, you should not be able to feel any of the “bumps” from the Styrofoam through the wool.

5. With the shank of wool in your dominant hand, pick up the Styrofoam form in your other hand.  Hold the form with the palm of the hand down.  With the thumb of the non-dominant hand on the bottom of the form and the fingers on top, place the end of the wool under the index and middle finger of the non-dominant hand and hold tightly to the form.  Pull the wool towards you, gently stretching and wrapping the wool around the form so that it overlaps the beginning place.  As you do so, the wool should be “thinning” as you go, so as to create a wispy covering around the form.  Repeat this process, continuing to pull and wrap the wool into strands, occasionally changing directions until the entire surface of the form has been covered.  Do not be concerned if the wool “breaks” away from the form.  This is normal.  Just begin again as above.  When you have used most of your wool, stop and feel the form to locate areas which may remain uncovered and apply wool to these “bumpy” areas until all are completely covered.  Remember it is better to err on the side of a little extra wool, as the wool will shrink during the felting process.

6. When the form has been thoroughly covered with wool, set it aside momentarily.  Here you made decide to add a secondary color wool.  If adding a second color, simply create bands of the color in the same wrapping manner as above.

7. When application of wool to the form is complete, pull the nylon stocking over your dominant (right or left) hand until the fingertips extend to the closed end of the stocking.  Spreading your fingers as wide as possible, place the form into the palm of your dominant hand (like a baseball glove) with your non-dominant hand and gently close your fingers around the form.  Using your non-dominant hand, turn the nylon stocking “inside out”, i.e., off your dominant hand, in order to enclose the form inside the stocking.  Be careful not to shift or dislodge the loosely packed wool on the form.  Once secured inside the stocking, tie a slip knot at the open end of the stocking immediately behind the form so it cannot move around in the stocking.

8. Next, fill a container or bowl with hot water.  The water need not be scalding, but should be as hot as can be comfortably tolerated by the fingers.

9. Dunk the nylon-covered form into the hot water.  Rotate the form with both hands to ensure that the entire form has been saturated.  Then set aside.

10. Wet both hands and thoroughly lather up your hands with soap.  Pick up the form and begin to distribute soap gently over the entire surface of the form.  Continue gently working soap around the form without applying pressure to the form at this point.  Too much pressure may cause the wool to slip and shift.  Rotate the form around in the palms of your hands, making little circles as you go and keep distributing the soap for about five (5) minutes.  If the form begins to feel a little dry, add a bit more water with your fingers from the water container.

11. Next, begin gently agitating the surface of the form with your palms, applying slight pressure and changing the angles of contact, circling back and forth, around and around.  Continue this process for approximately four (4) minutes.  At the end of this process, the wool will have begun to tenuously adhere to the Styrofoam form.

12. Gently remove the nylon stocking from the form, ensuring that the nylon is not catching or sticking to the wool.

13. Feel the form to make sure that no shifting has occurred in the wool, and that the form’s entire surface remains covered by wool.  When satisfied, begin transferring the form between the two hands/palms (slapping), as if forming a meatball.  This process will flatten any areas of wool which may be uneven or sticking up.  Once done, begin agitating the form between the two hands with greater pressure using the palms.  Continue for several minutes, then squeeze out any excess soapy water.

14. Next, re-wet the form with new hot water.  Again squeeze out any excess water.

15. Alternate between the transferring/slapping motion and the rolling agitation for about ten (10) minutes.  Add hot water and squeeze out excess when it gets cold.  Feel the form for any lumpy spots, slap down and add more hot water to cause shrinkage and felting.  If the form begins to dry out, add more soap with the hot water so that the wool can continue moving and felting.  (Note: Remember that felt is the result of hot water, soap and agitation.  Inadequate application of any one of these three elements may prevent successful felting.)  Shock fulling is the process of applying greater force to complete the felting cycle.

16. Finally, rinse the form in cold water to “full’ or finish the felting process.  Squeeze out any excess water with the hands.  Wrap the finished felted form in a towel or paper towels to remove all remaining excess water.  Set aside to air dry.

Addendum:

If making a Christmas ornament to be hung, this can be accomplished using a 5 inch rug needle and a smooth string or twine.  Thread the needle with the desired string and insert the needle through the center of the ball/ornament.  With the string extending from both the top and bottom of the form, tie a knot on the bottom and pull the string from the top until the knot is snug against the bottom.   Be careful not to pull too hard or the knot will penetrate the felt and Styrofoam form.

Once the bottom is secured, remove the needle and tie a loop about 2 or 3 inches above the top of the form.  Be sure that the loop is large enough to fit over the needles on a branch of the Christmas tree.  Trim any excess string from the bottom knot and top loop.

Sensational BlackBoard: Quick Fix

Sensational BlackBoards

This blog is for fans of the Sensational BlackBoard. If you have ever had a drawing tear and you would like to know how to easily fix it, we have made a short video to show you how.

If you are interested in making tactile graphics but have no idea what we are talking about, you might want to check out the Sensational BlackBoard on our products page.

Here are other instructional videos that you might like to view. Please enjoy!

If you have questions or comments, please post them in the comments section below.

Nancy Cozart and the Indomitable Nine

Nancy Cozart, a Teacher of the Blind and Visually Impaired (TVI) for the Littleton Public Schools in Colorado, is one of those teachers who you hope is assigned to your child. She is generous with her time and thoughtful about organizing activities, not only for her students but for their friends and classmates.

Portrait of Nancy Cozart.

Nancy Cozart 

This January, I was invited to talk about how to use a raised-line drawing board to make art. The Sensational BlackBoard is a tool that offers a technique to make drawings with a pen and paper that can be felt as well as seen. There are nine boys who regularly get together to explore the secret code of Braille and also enjoy learning about alternative ways to go about everyday and special activities without using sight.

Five students sitting around the table exploring pictures with their eyes closed.

(Some of) The Indomitable Nine

I was invited to talk about art making. The first activity was to learn how to use the board.  Nancy said, “the first word my student who is legally blind said after his first drawn line using the blackboard was “WOW”.” I can describe and show you how to draw using the board but people don’t seem to really get it until they are able to touch the line and feel it for themselves. So, it is always fun to be there when someone discovers how drawing can become a tactile activity!

Ann Cunningham talking giving instructions on tracing a dinosaur picture.

Ann Cunningham

Engaging kids in activities that demystify the differences between people is a powerful technique to connect students. I was talking to a friend who said that she is still sad that when she was in grade school a child came to their school who had some significant challenges. But instead of teaching the children how to talk about it, they were told to ignore it. Unfortunately, that led to them ignoring the child too.

The young man holds up a picture of different kinds of lines as his first tactile drawing.

The Sensational BlackBoard in action

Nancy’s Braille Club is forging pathways to understanding that I am pretty sure all the students will be able to use the rest of their lives. When they think back on their classmates I think there is a good chance it will be with a sense of happy adventure.


Making Spaghetti Make Sense

I was asked by Colorado Ski for Light http://cosfl.org  to make a map of Snow Mountain Ranch, Nordic Center ski trails. Sounds easy enough. Once I had the map in hand, I realized this place is a rabbit warren of twisting trails crisscrossing through miles of terrain. I know making a map is a whole different kettle of fish from tactile art making but I felt up to the challenge.

NordicMaptrails

First, I needed to decide how many different trails people need to distinguish, one from the other.  Clearly folks need to know which trails are easy, intermediate and expert. Since the snowshoe trails and dog trails intersect the ski trails that would also be helpful to distinguish. Of course people need to know where the roads are too.

Once I knew I needed to create six distinct textures for the different paths, I decided to accomplish this by cutting all the maps out of poster-board. These trails would then be placed as an overlay on the low relief map indicating terrain contours.

I decided to use the smooth texture for the road. After a lot of trial and error, I decided to glue an embroidery thread to the middle of the dog trails. I then assigned a fabric strip with a distinct texture to the snowshoe routes because these often ran adjacent to the ski trails. The texture was distinct but subtle so that it would not distract from the ski trails.

IMG_1609

For the ski trail, I reserved Braille sized dots because they are the easiest to scan for with big sweeps of the hand. Once you zero in on the trails they are distinguished by the dot spacing. Easy trails have the dots one after the other, just a solid line of dots. The intermediate trails have about a 3/16 inch space between dots, and the expert trails have about a 3/8 inch space between.  By having dots assigned only to the ski trails, it is easy to find them and then by looking closer, it is easy to determine the trail’s ability level.

map detail

The starting place for all activities, the Nordic Center, was indicated by a big star, and the points of interest had a round indicator identified by Braille letters. The key to the trail names and points of interest and trail identifiers are on both sides of the map so that two people can look at the map together and easily access the information.

Map Lg

Christine McGroarty, from Ski for Light, wrote: “The tactile map is wonderful. It was unbelievably interesting and exciting to be able to get a sense of how the grounds are laid out. I have skied at Snow Mountain Ranch for years and had no image of the grounds, but now I do. Over the course of the weekend, I and several of our other blind participants spent considerable time exploring the map. Our deaf-blind skier was particularly excited to be able to get a mental picture of how the grounds are laid out.”

Screen Shot 2016-02-15

We would very much like to recognize the Englewood Lions Club for sponsoring the map.

IMG_3037